I know, I know -- I already have a post up about GCC, Homebrew, etc. in OSX. This post obviously describes experiences that happened first chronologically, but it also took significantly longer to write. Therefore, the longer post got pushed back as I finished other shorter pieces that could be knocked out in available windows of time. Mea culpa. Moving on!
I'm officially an OS X user now. Here I document the what, why, and how of installing OS X Yosemite (10.10.4) on my non-Apple-branded laptop, an HP Probook 6460b. I also highlight where I went wrong in a few places. ;-)
I've had a laptop sitting on a shelf for awhile (long story) that I have been meaning to use as a hackintosh. For the uninitiated, a hackintosh refers to a computer with standard x86/x86-64 hardware running Apple's proprietary OS X software. Of course this may be in violation of the EULA, but Apple refuses to sell their operating system independent of hardware -- and the last OS update that they charged (a paltry $20) for was Mountain Lion in 2012. The numbers show that Apple is in the hardware business, using their walled-garden OS platforms to drive hardware sales. Apple makes the bulk of their cash on the unmatched margins they are able to charge on their hardware, with content/app sales making up a much smaller (but non-trivial) percentage of their business.
So it's totally understandable that they won't sell me a copy of OS X without hardware, or that even if they're giving away the OS for free they don't want to make it easy to use on non-Apple hardware. The fundamental mechanic of their business model is "hey if you want to use our stuff, you have to pay a mint for the stuff it runs on." However, I am also at the same time not comfortable (just my opinion) spending $1,500-$2,000 on a laptop without test driving OS X for a couple months. A 14 day return window is not nearly a sufficient test period. Sure, I could boot camp Windows or install Linux if I decide I really don't like OSX, but the tight hardware/software integration is a huge part of the appeal of buying an Apple device in the first place. If I wanted a nice Windows laptop, I could save some money and buy a Dell XPS 13 or something.
While I'm on the topic of hardware/software integration, I should mention at the outset that working with a hackintosh absolutely makes a person (if you like using the software of course) yearn for a device actually intended to run OSX with OEM support.
The hardware
Preamble out of the way, lets get down to business. The laptop I used is an HP Probook 6460b. I originally ordered a Probook 6560b because I wanted a 3rd-gen Intel Core processor with HD-4000 graphics and the product was listed with the optional 1600x900 screen upgrade, but (as part of the other long story previously mentioned) I ended up with the 6460b.
It's got an Intel Core i5-2540m that runs at 2.5Ghz with turbo up to 3.2Ghz, HD-3000 graphics, and unfortunately a paltry 1366x768 resolution screen. It arrived with 4GB of ram, and I dropped in another 2GB (no 4GB dimms lying around) I had spare for 6GB total -- though it seemed to generally perform fine with 4GB. I haven't done anything too taxing or fired up a bunch of VMs. yet.
False start
So I'm going to admit here that my first attempts to get OSX installed involved a downloadable ISO/DMG with Yosemite called "Niresh" or "Hackintosh Zone" depending on where you're reading about it. I'll leave it to you fine readers to google it, but beware that the official Hackintosh Zone website is just littered with ads and may set off your virus scanner and/or malware alarm. So, you've been warned, seek out at your own risk, etc., etc.
At any rate, when you read the various forums dedicated to hackintoshing, this shortcut approach is generally frowned upon, but I had also stumbled across a guide or two that made it sound like a suuuuuper simple and easy way to get up and running without much fuss. And in my defense, I did have a thumbdrive set up to do the install the "hard way", but it was created with the configuration files for the 6560b. So without a Mac of my own to recreate/reconfigure the thumbdrive, I was looking for another approach...
Unfortunately, like most things when you try to take shortcuts, the Hackintosh Zone disk image approach didn't turn out exactly like I had hoped. I won't describe that installation process, but it did result in a bootable OSX system. However, it was a few minor updates behind (10.10.1 vs 10.10.4) and unable to accept system updates. I believe it also failed to correctly configure all of the components in my laptop, though most things "sort of" or "mostly" worked. Still, I had read enough to know that these Probooks are very compatible with OSX -- compatible enough that if you install things the right way, almost everything really should work, and so I knew that I needed to start over and do it the "right" way.
What worked
Which brings me to the guide that held my hand through the process. It's the guide that I used to create the first thumb drive -- the one that had the wrong configuration files after I ended up with the 6460b instead of a 6560b. The one good thing to come out of my first attempt was that I had gained access to the Apple (OSX) App Store, even if everything wasn't working 100%. With that, I could download Yosemite again and recreate my thumbdrive according to the (linked) guide with the correct configuration files.
I won't restate the whole guide here, but for anyone who attempts this process, the instructions need to be followed very specifically.
One thing that I did have to fiddle with is my BIOS settings -- and not just those mentioned in the guide. Specifically I had an issue with WiFi toggling not mentioned in the guide. I'm not sure if it only affects this model, or certain BIOS versions, or what the root of the problem is, but apparently it's not widespread enough that the author of the guide had encountered it.
The problem was that the WiFi worked, but if it was toggled off either in system preferences or by plugging in an ethernet cable, then I couldn't get it to turn back on. Through some googling and pondering I found a solution by disabling the Wireless button state in the BIOS. I have no idea why this made a difference, but now it works for me. Of course, the physical button on the laptop used to toggle the WiFi radio no longer functions to either toggle or display WiFi status -- it just stays on all the time, but that's not a dealbreaker.
Here are some screenshots of my BIOS settings with explanations.
BIOS Config Menu
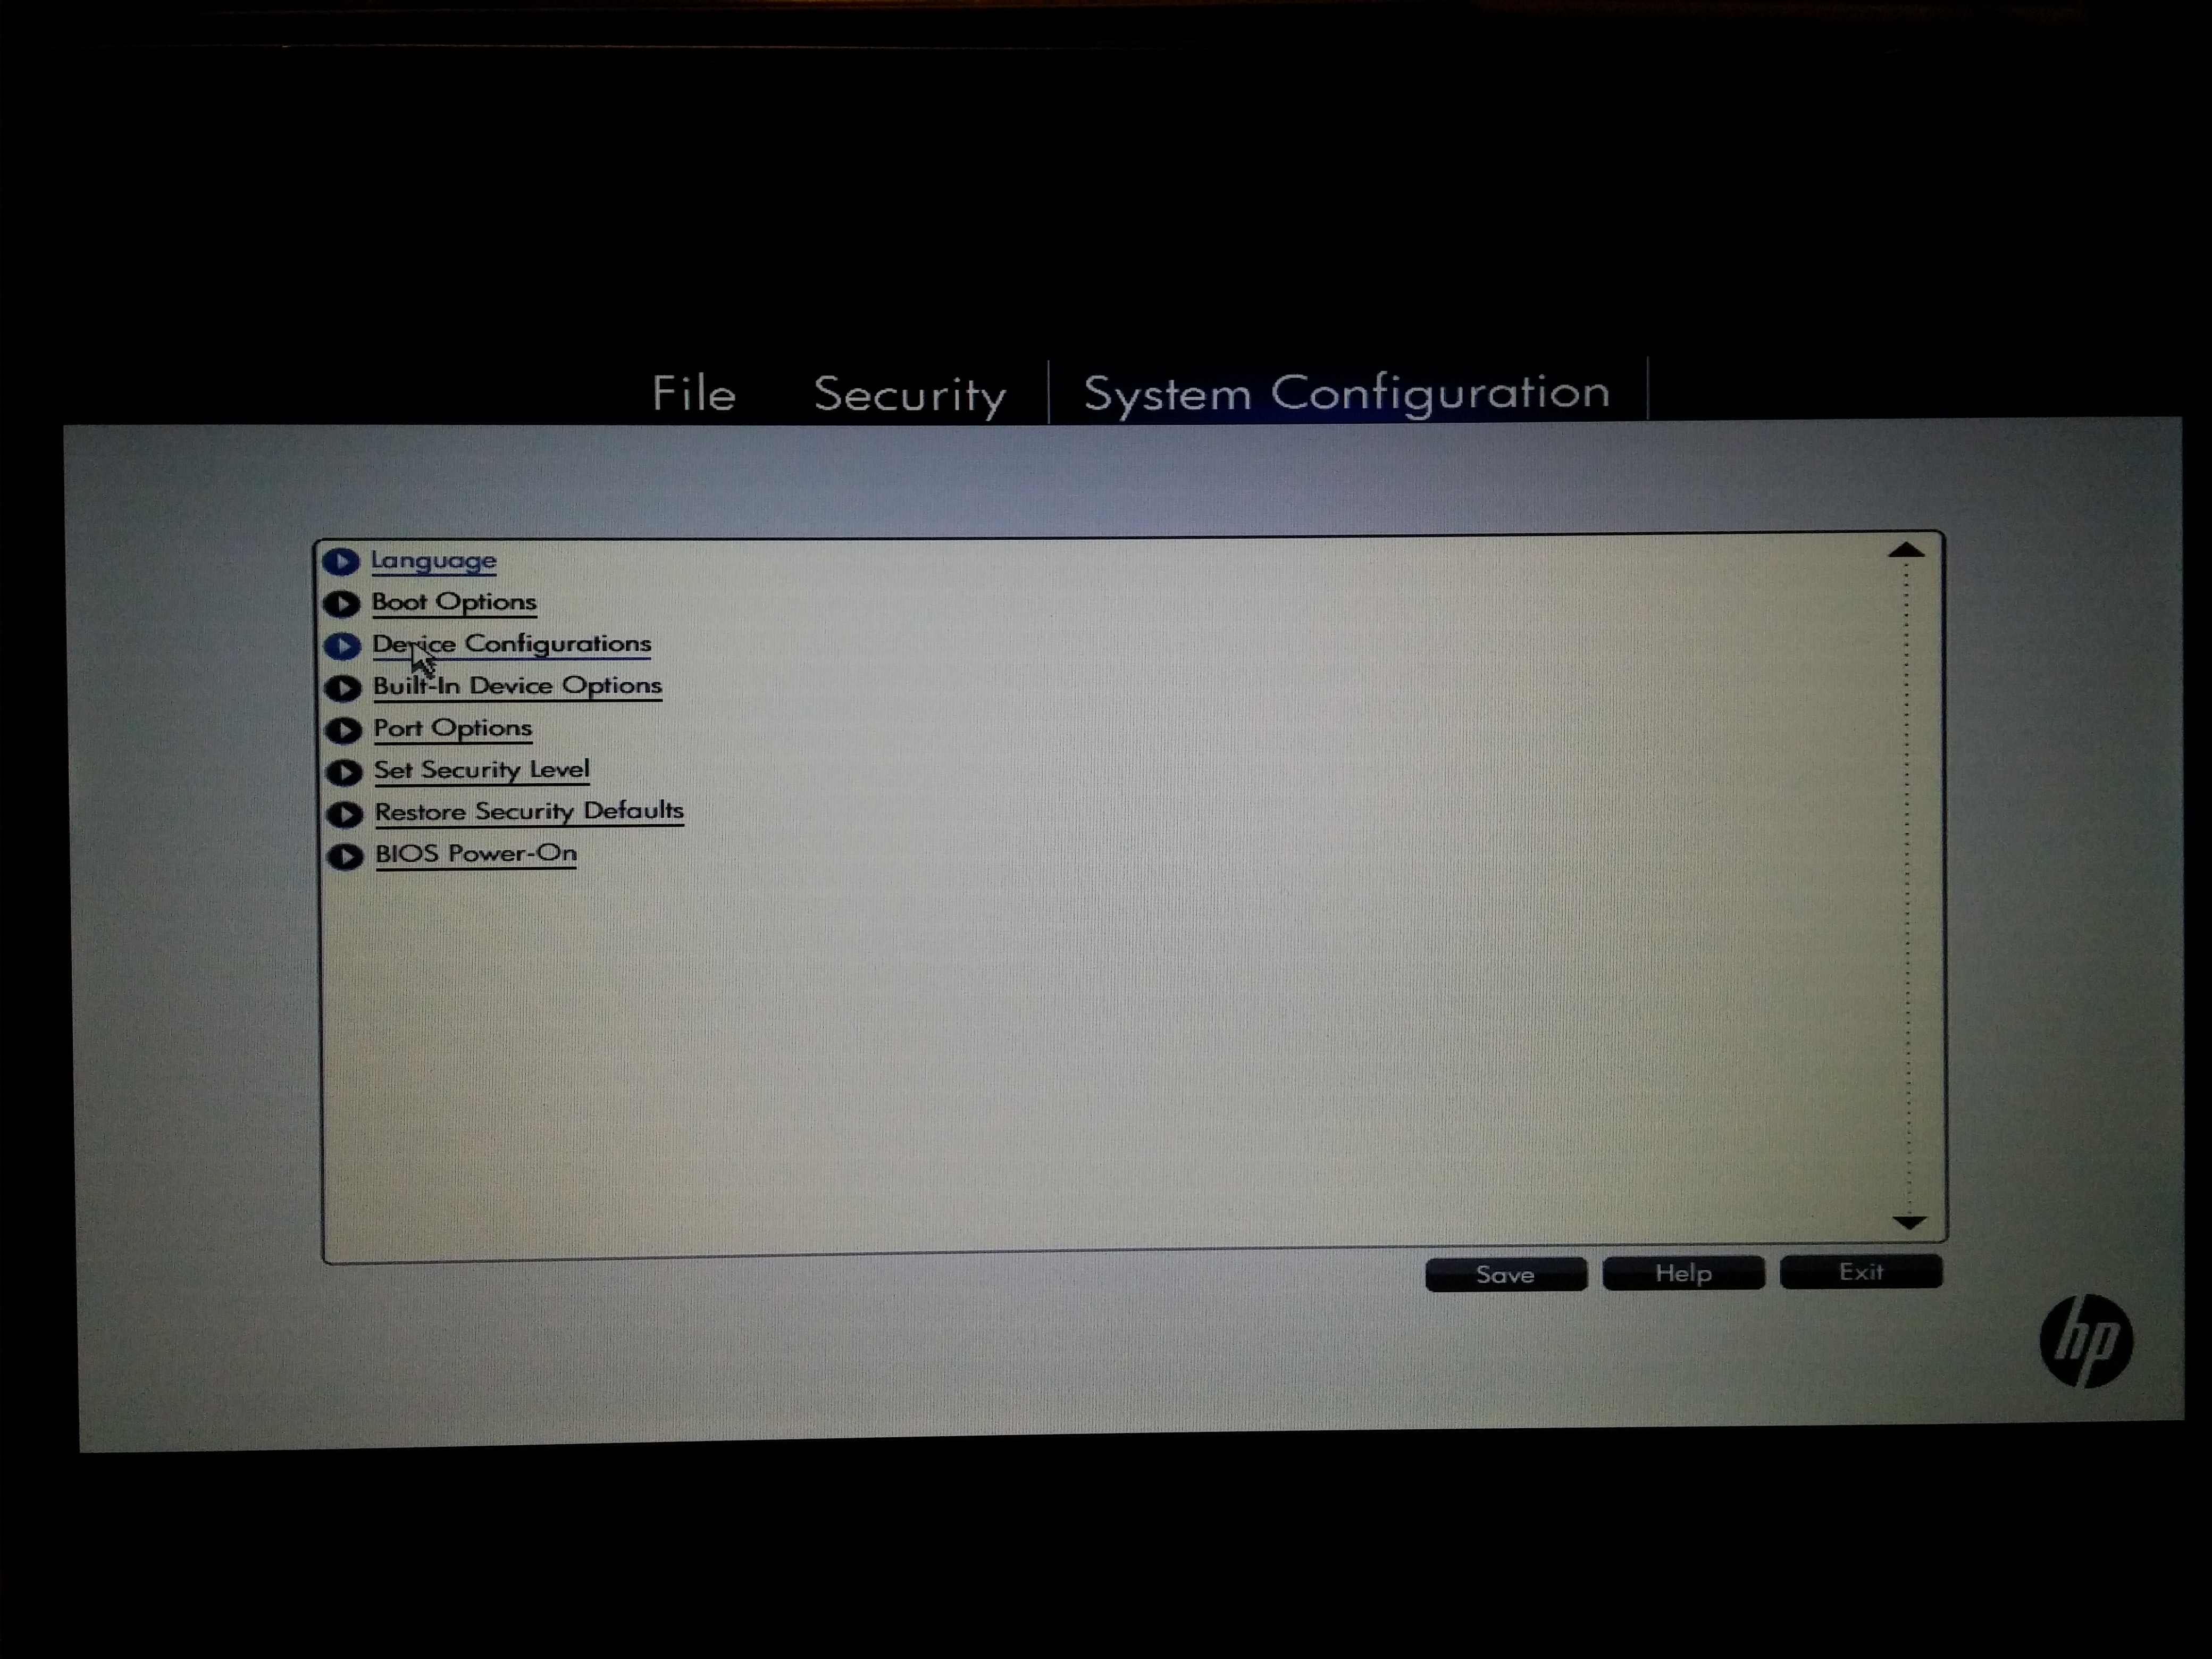 Nothing to see here really
Boot Options Screen 1
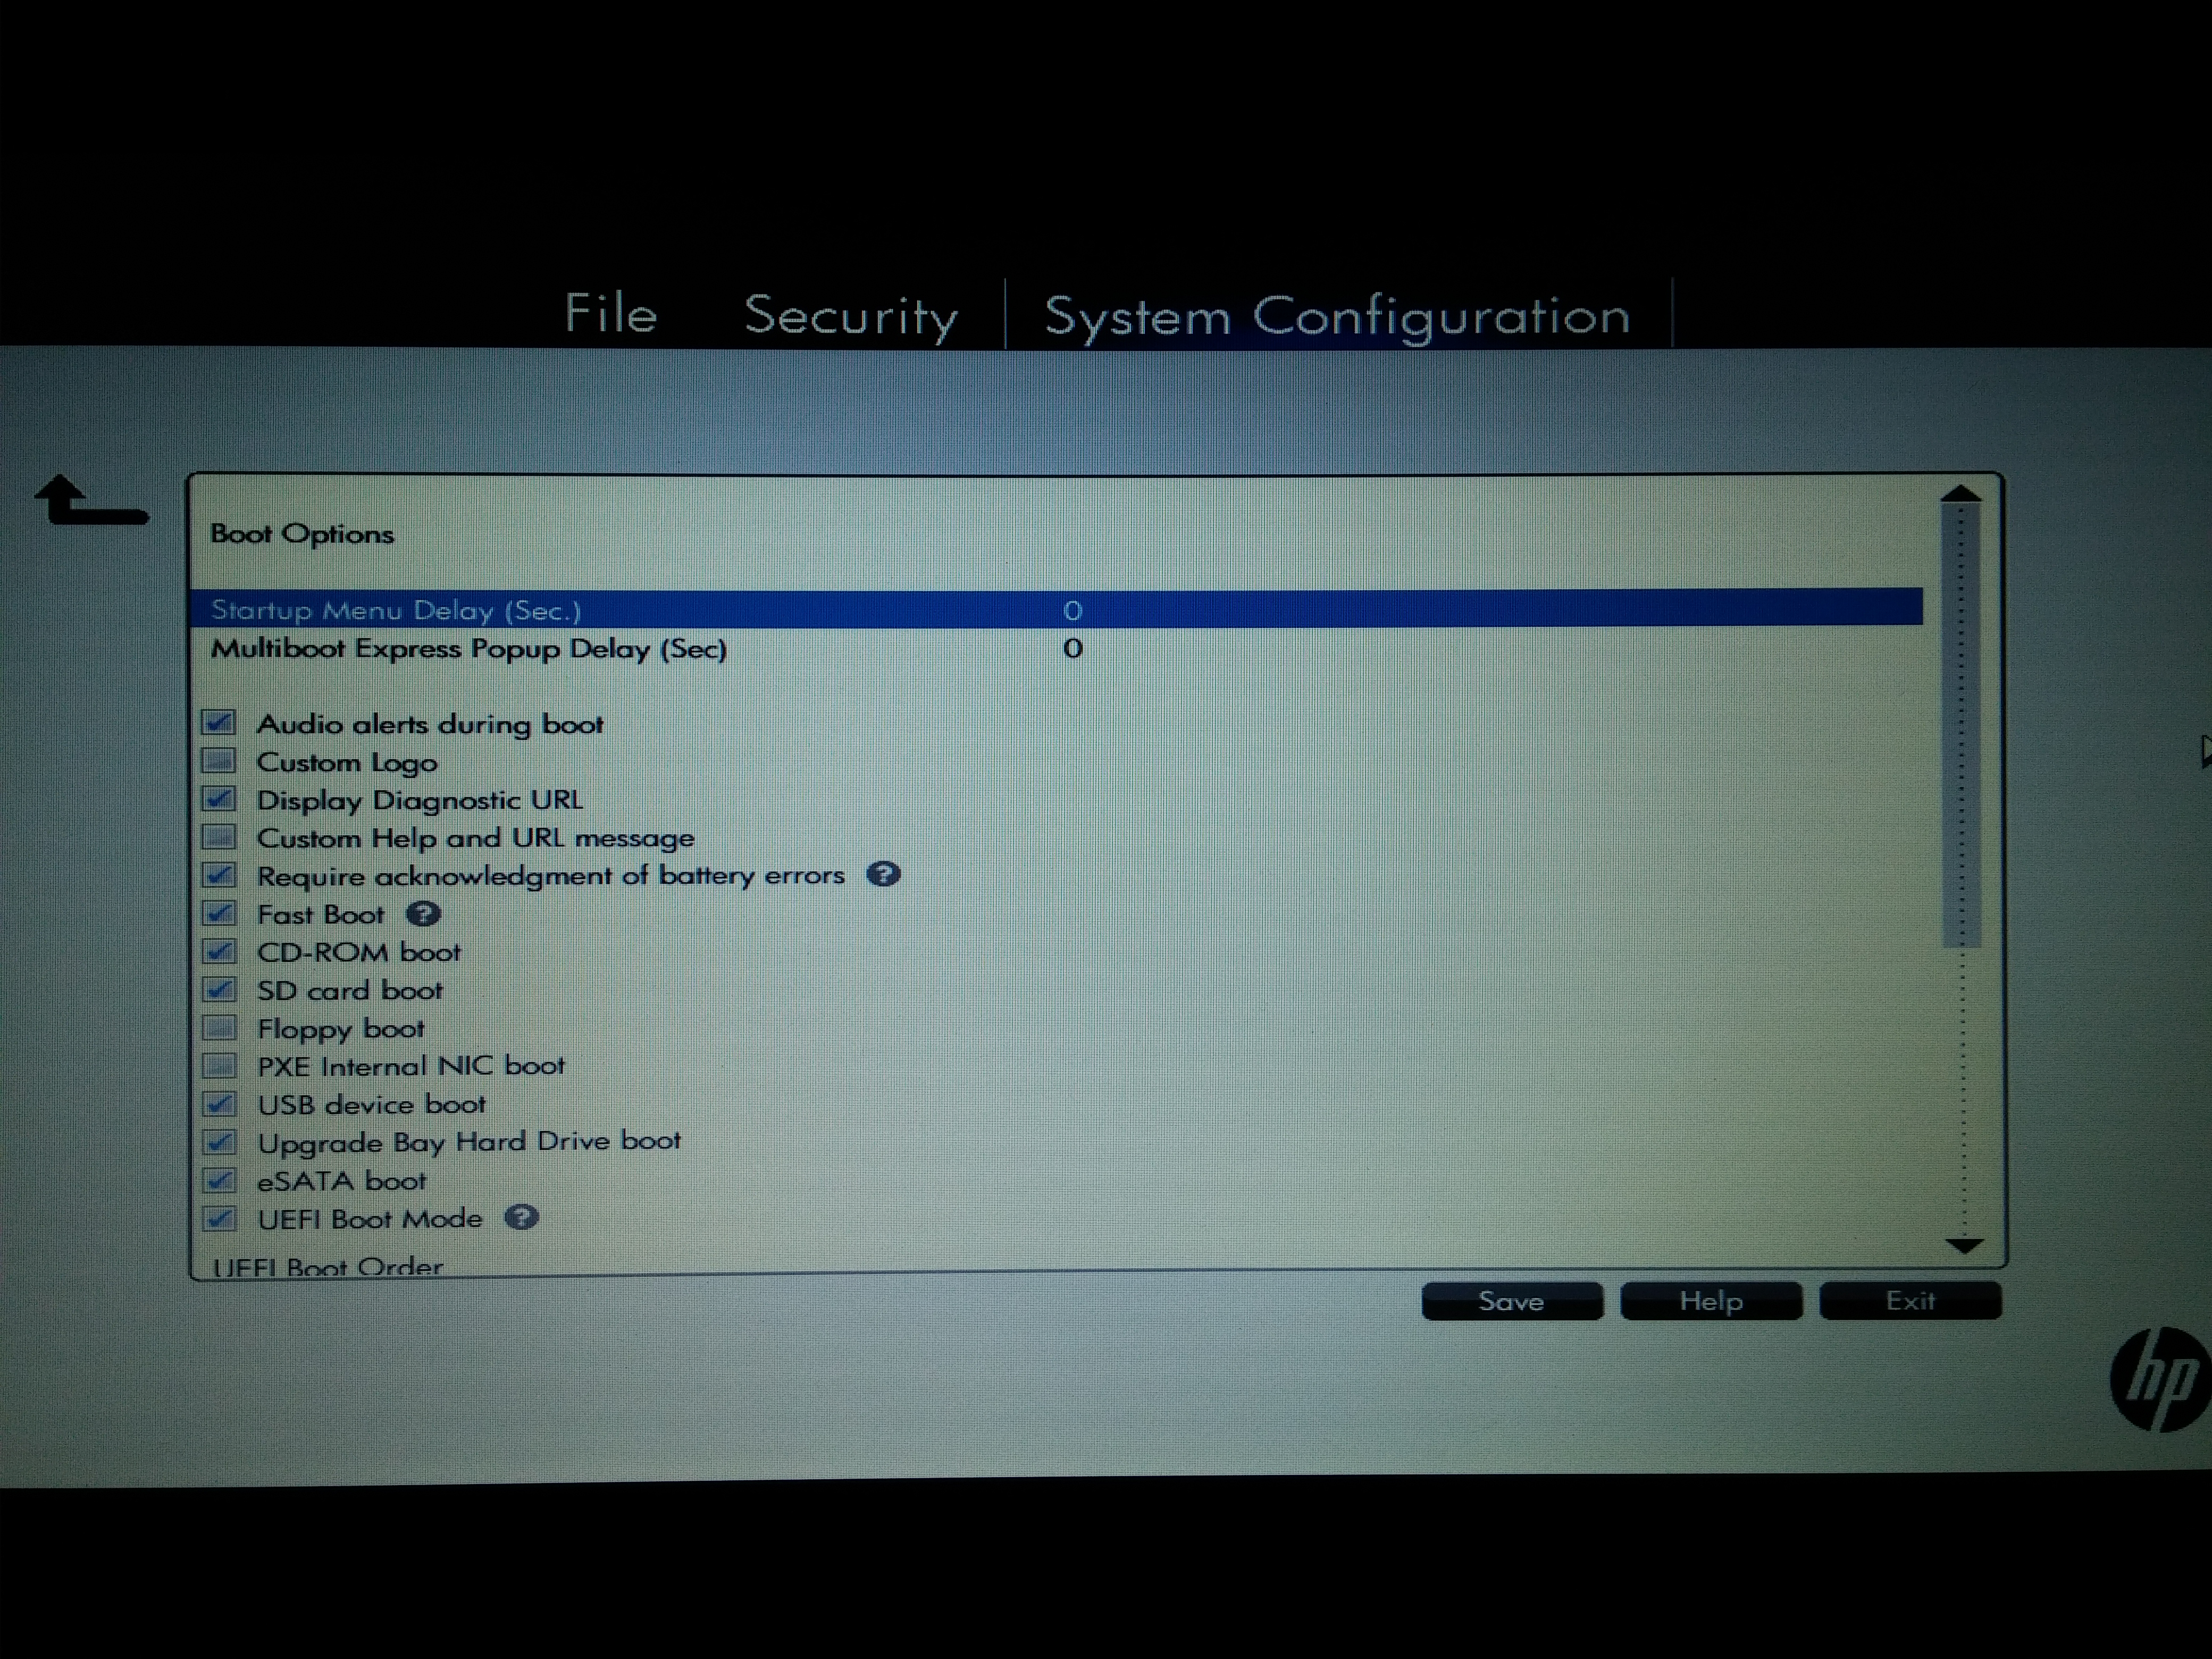 The important thing here is turning on
 UEFI Boot Mode and USB device boot - need both to install OSX off a thumb drive this way!
Boot Options Screen 2
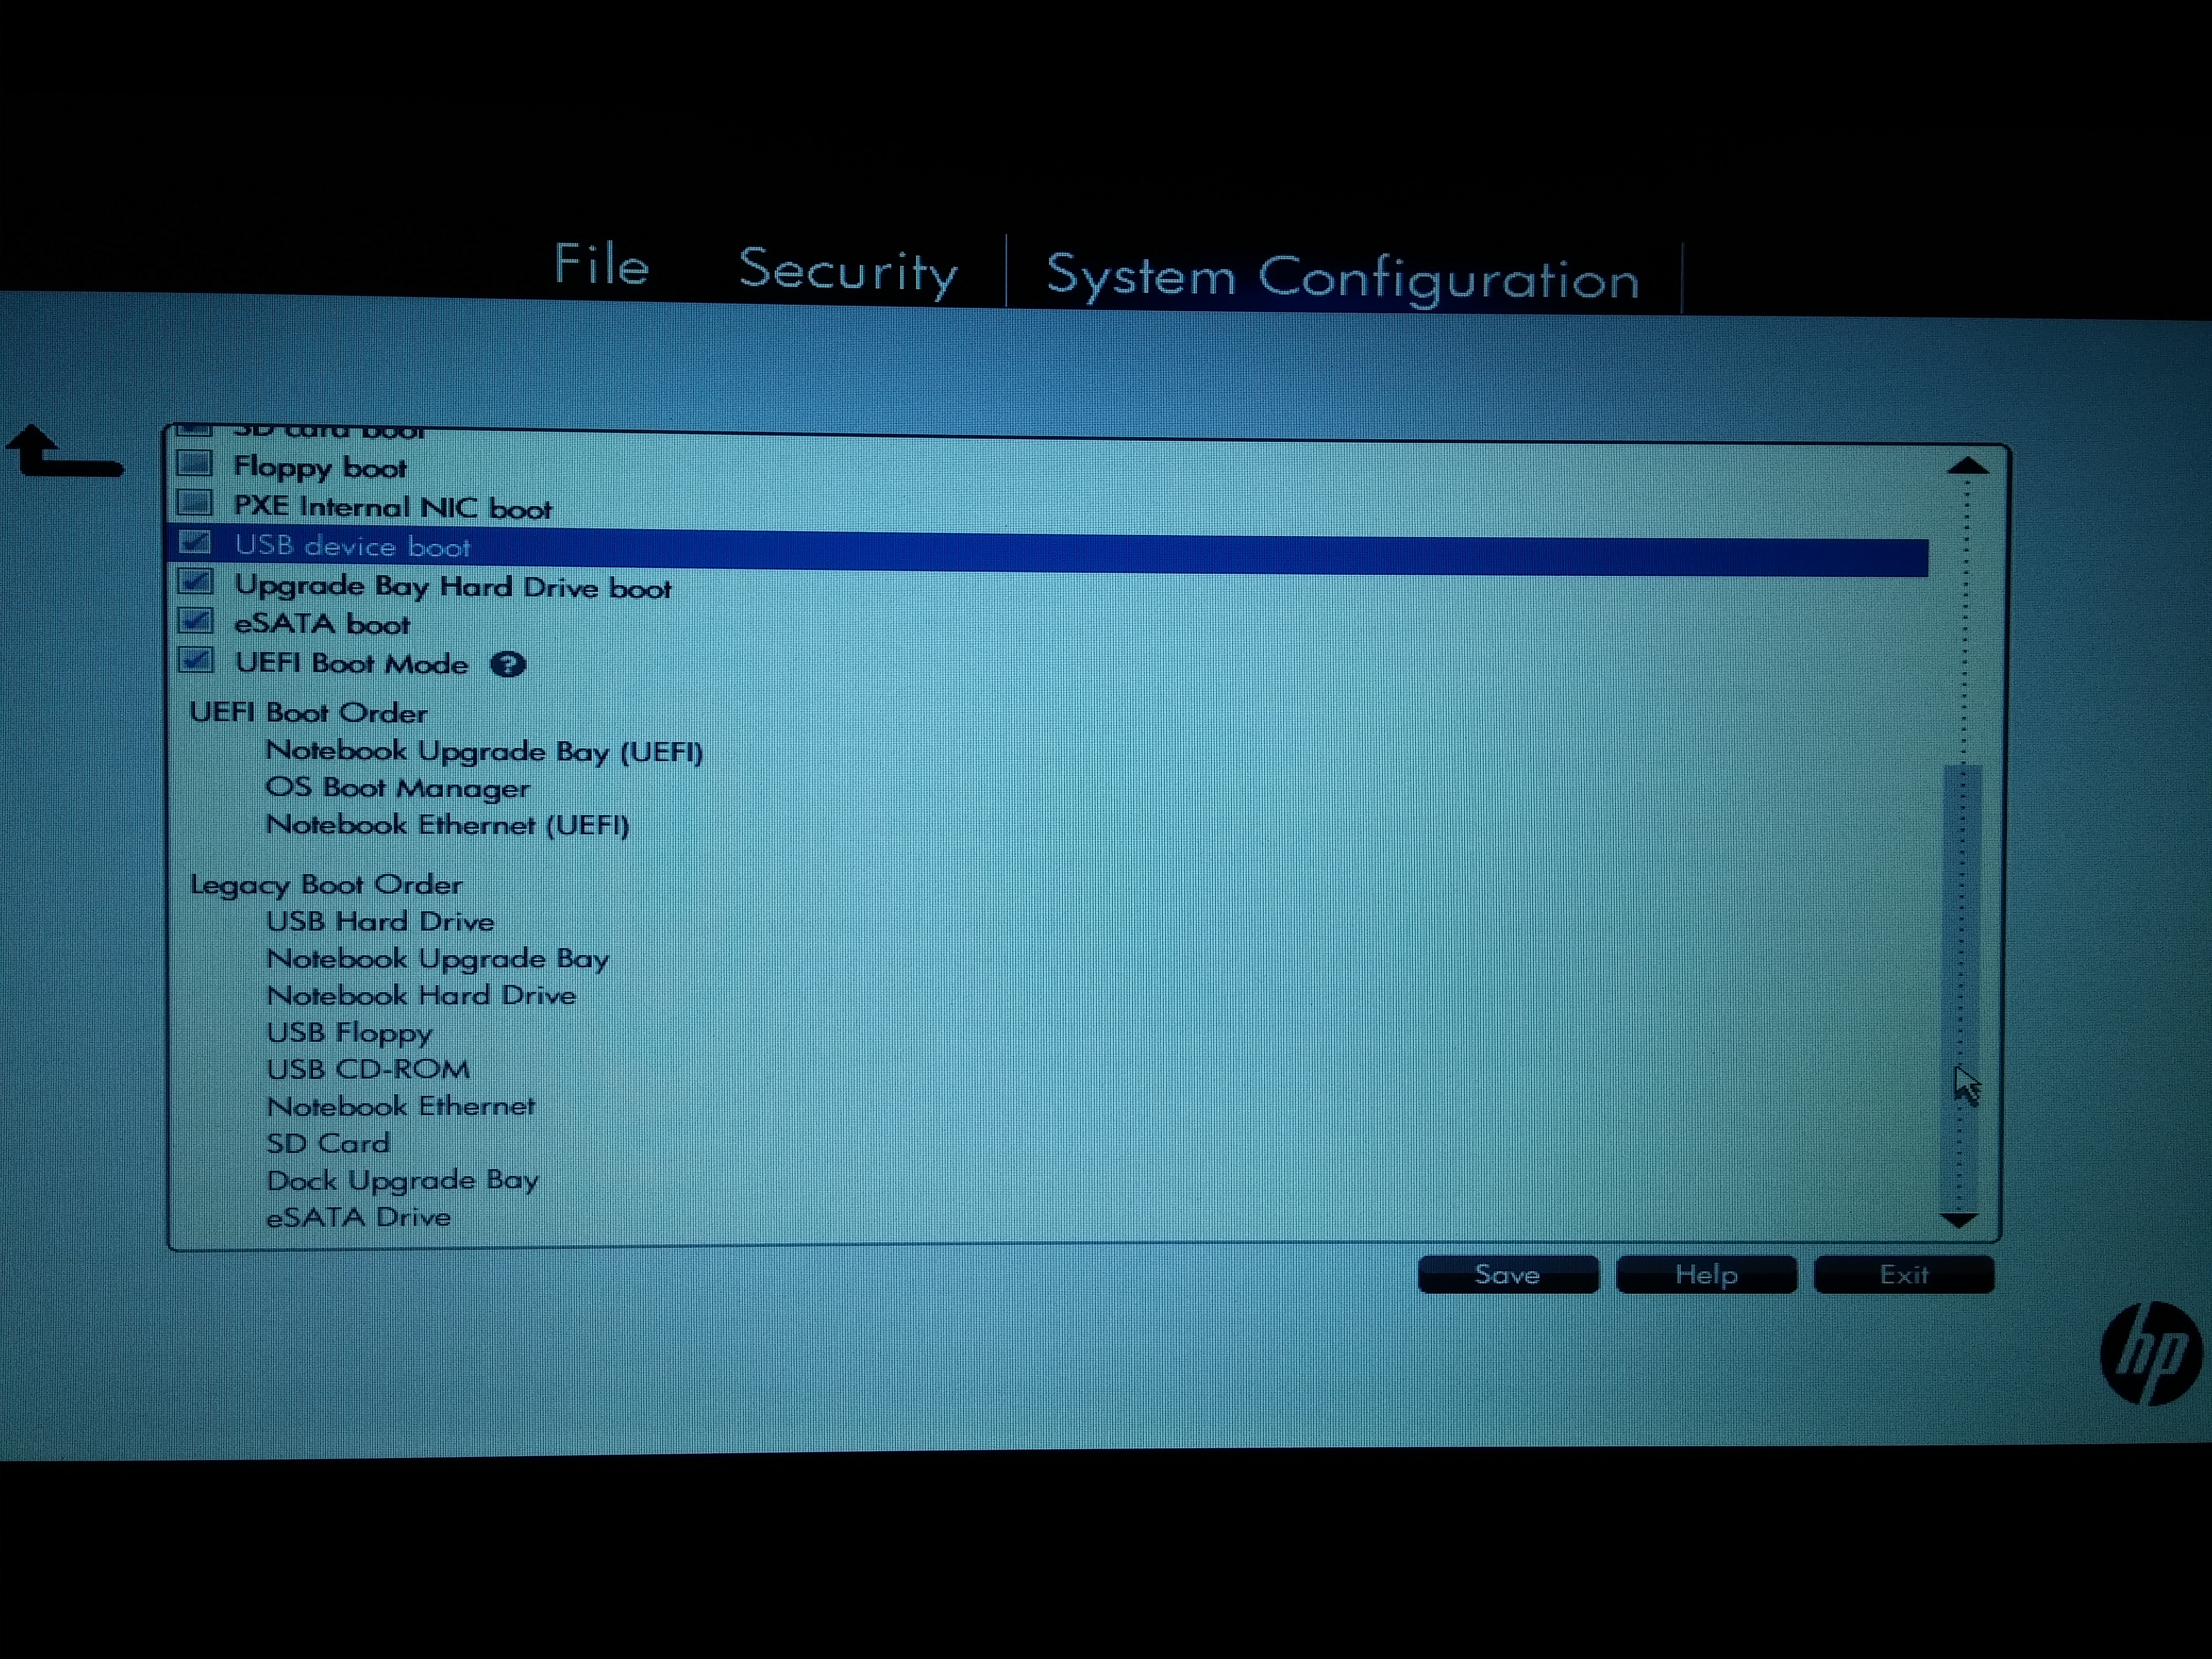 Legacy boot order really shouldn't matter. Both the thumb drive and OS are going to be booting UEFI. UEFI order also shouldn't make much of a difference -- I used
 F9 to manually select my boot device for the installation process.
"Device Configuration" 1
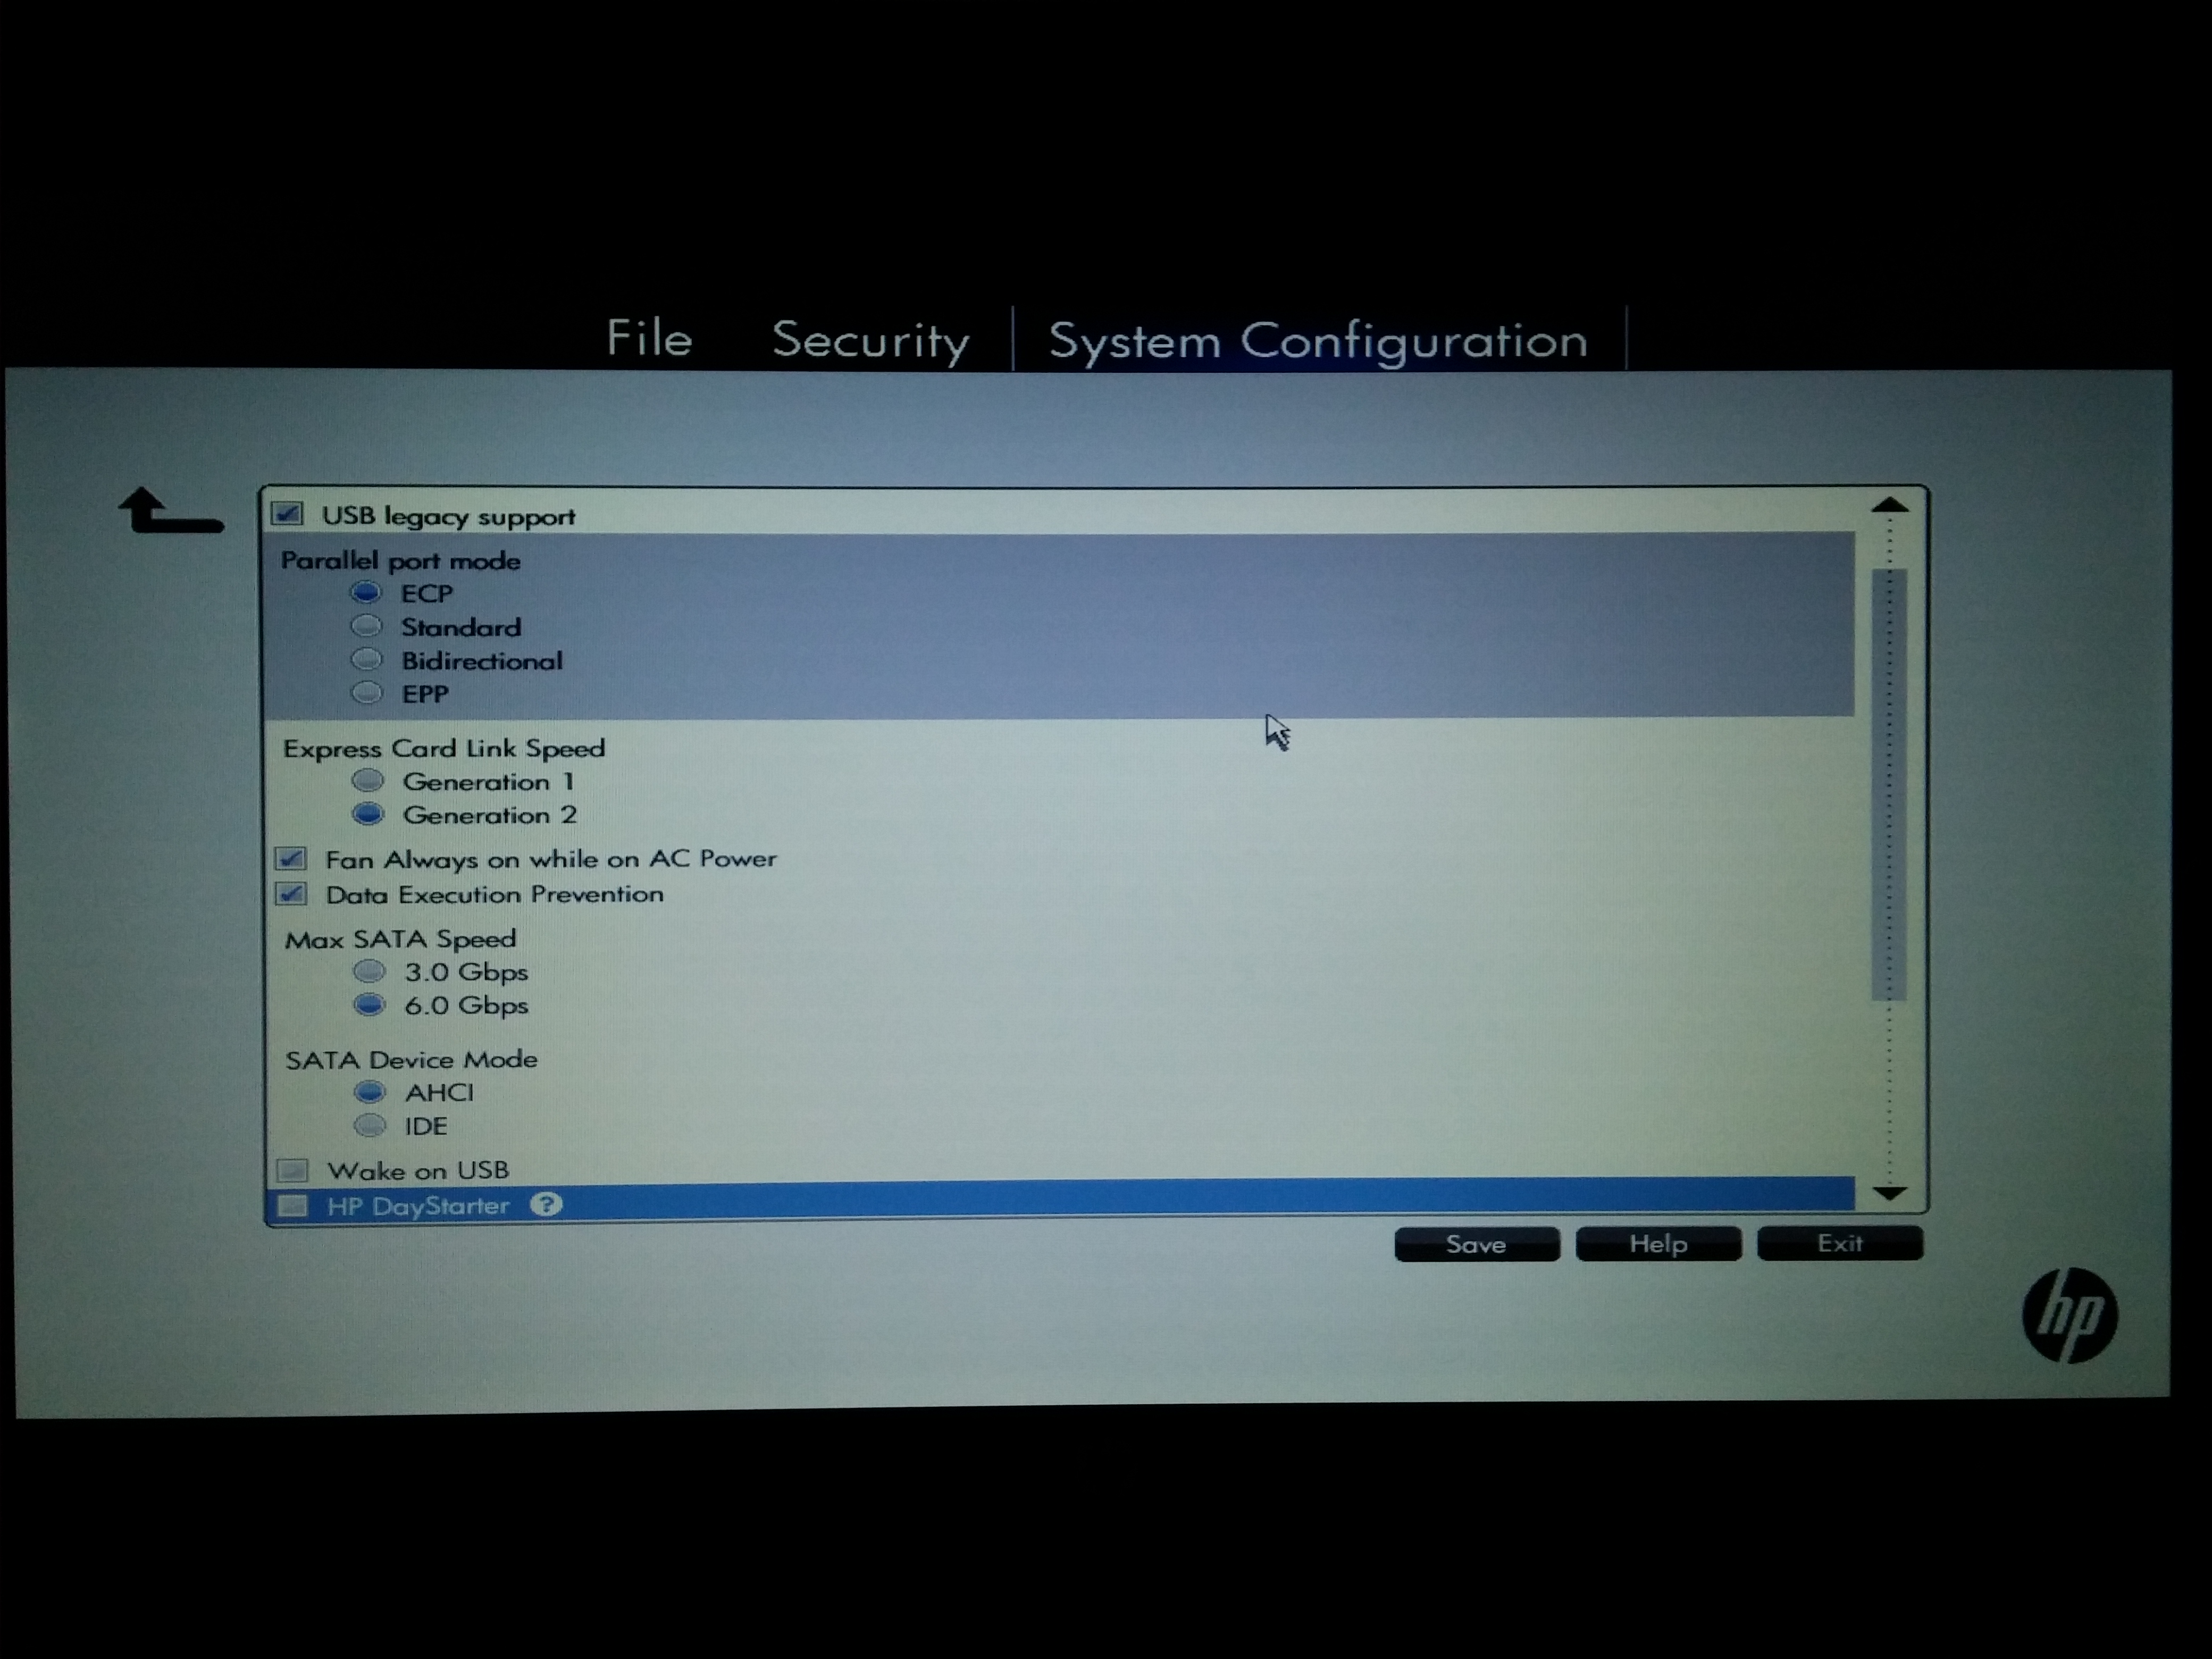 Besides ensuring that
 SATA Device Mode is set to AHCI, I don't think much here makes a difference at least as far as installing OSX is concerned. I guess it might go slower if you chose 3.0Gbps for your Max SATA Speed, so maybe don't do that. ;-)
"Device Configuration" 2
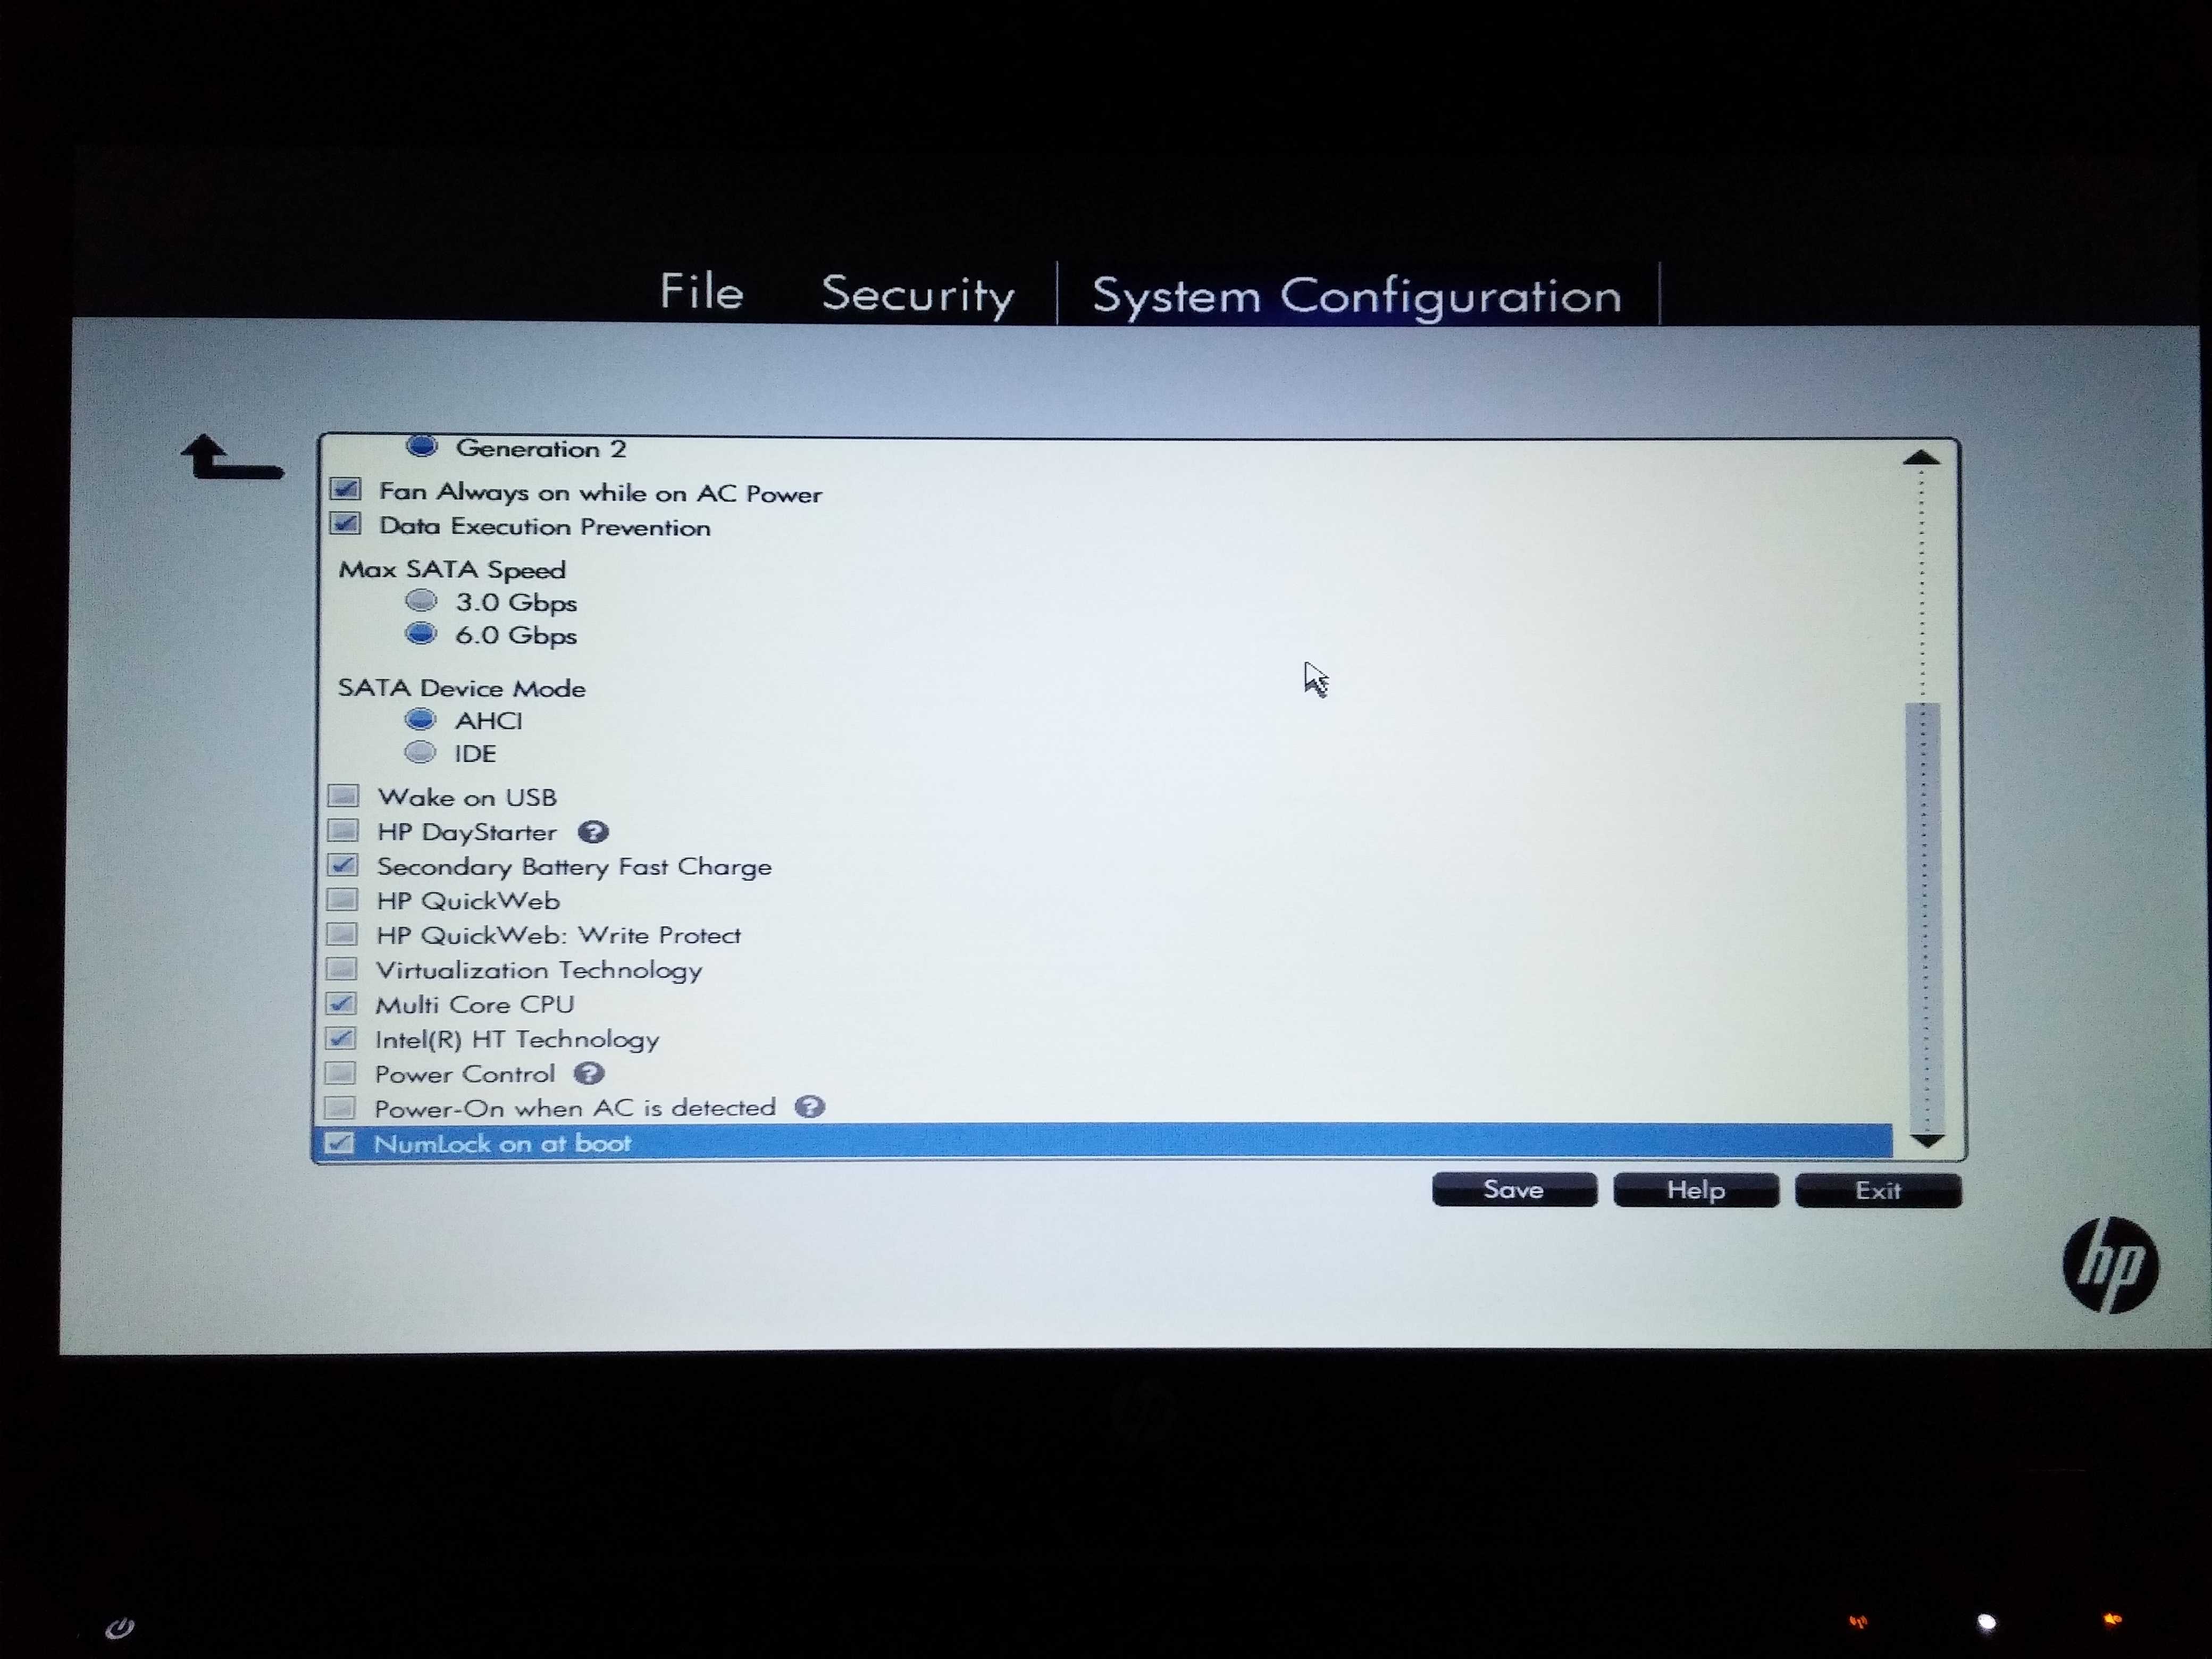 Again, I don't think anything in the lower half of the screen is super important, but using the CPU to its max potential is always nice, so I'd leave multi-core and hyperthreading enabled. I'm not entirely sure why I turned virtualization off... I vaguely remember reading something about hackintoshes not playing nicely with virtualization enabled in bios, but I don't think this flag made a difference for me either way.
Built-In Device Options
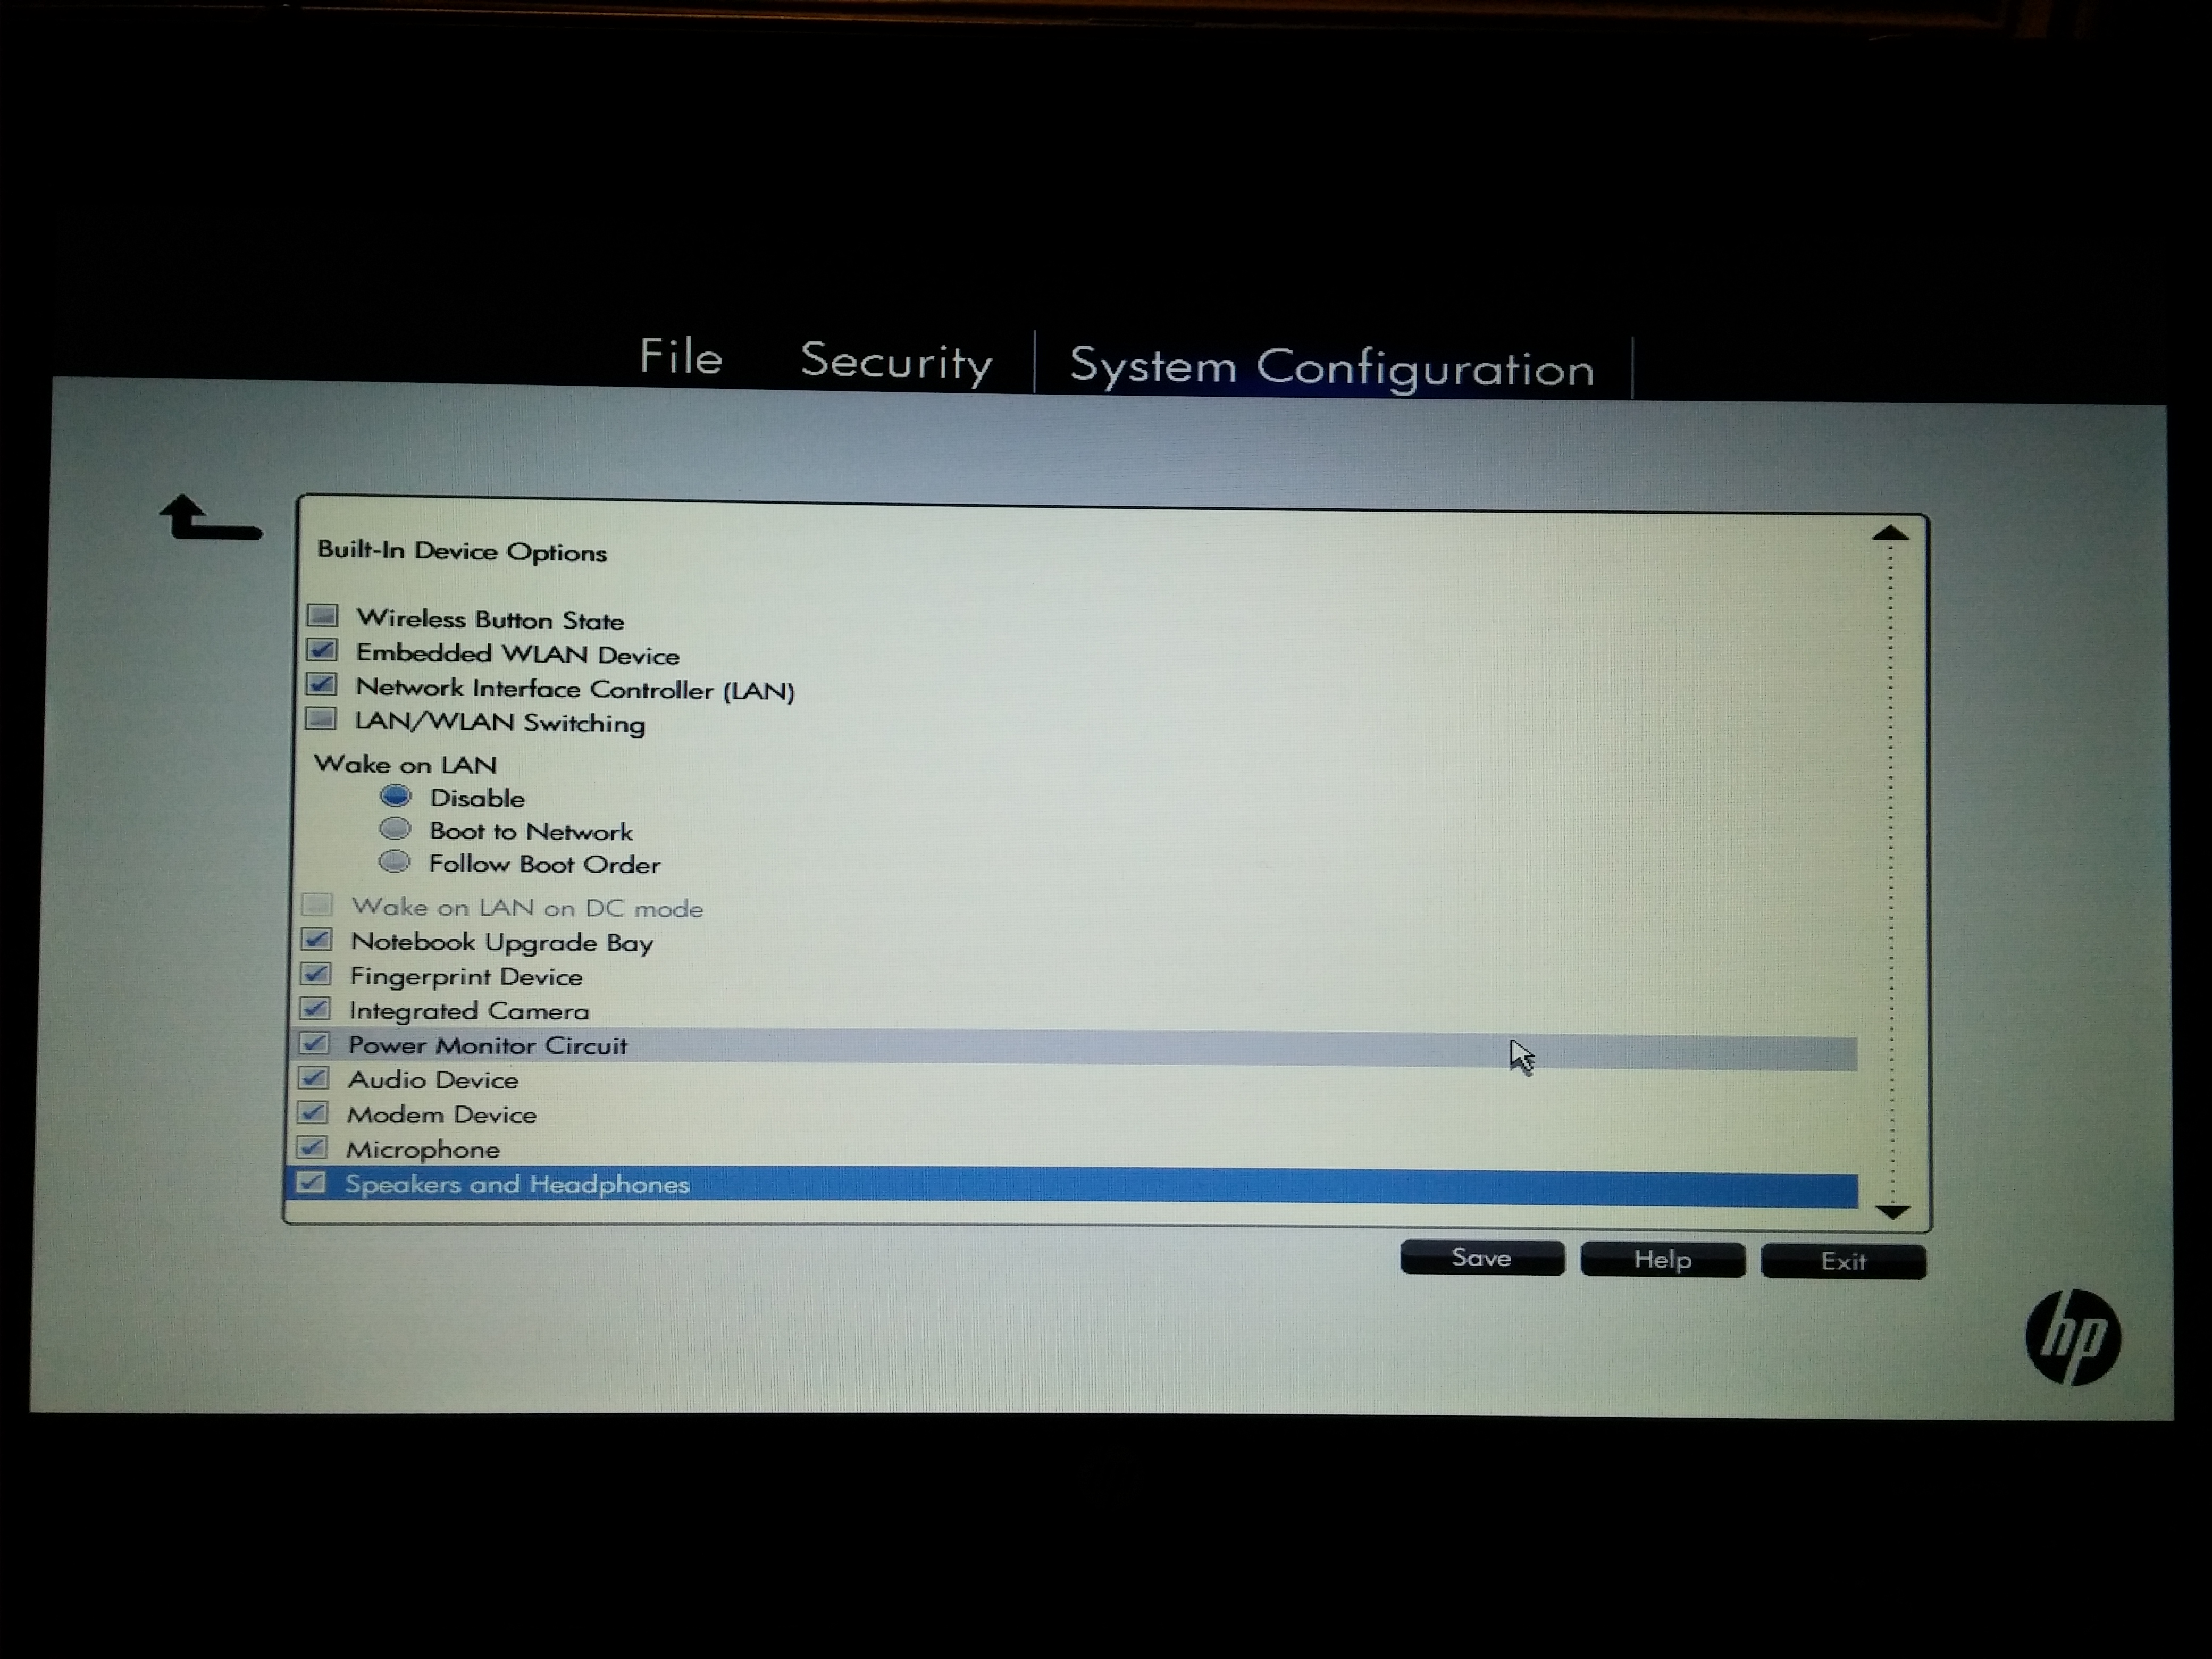 This is where the important ones start. As mentioned earlier I disabled
 Wireless Button State, and Wake on LAN and LAN/WLAN Switching must be turned off according to the guide.
Port Options
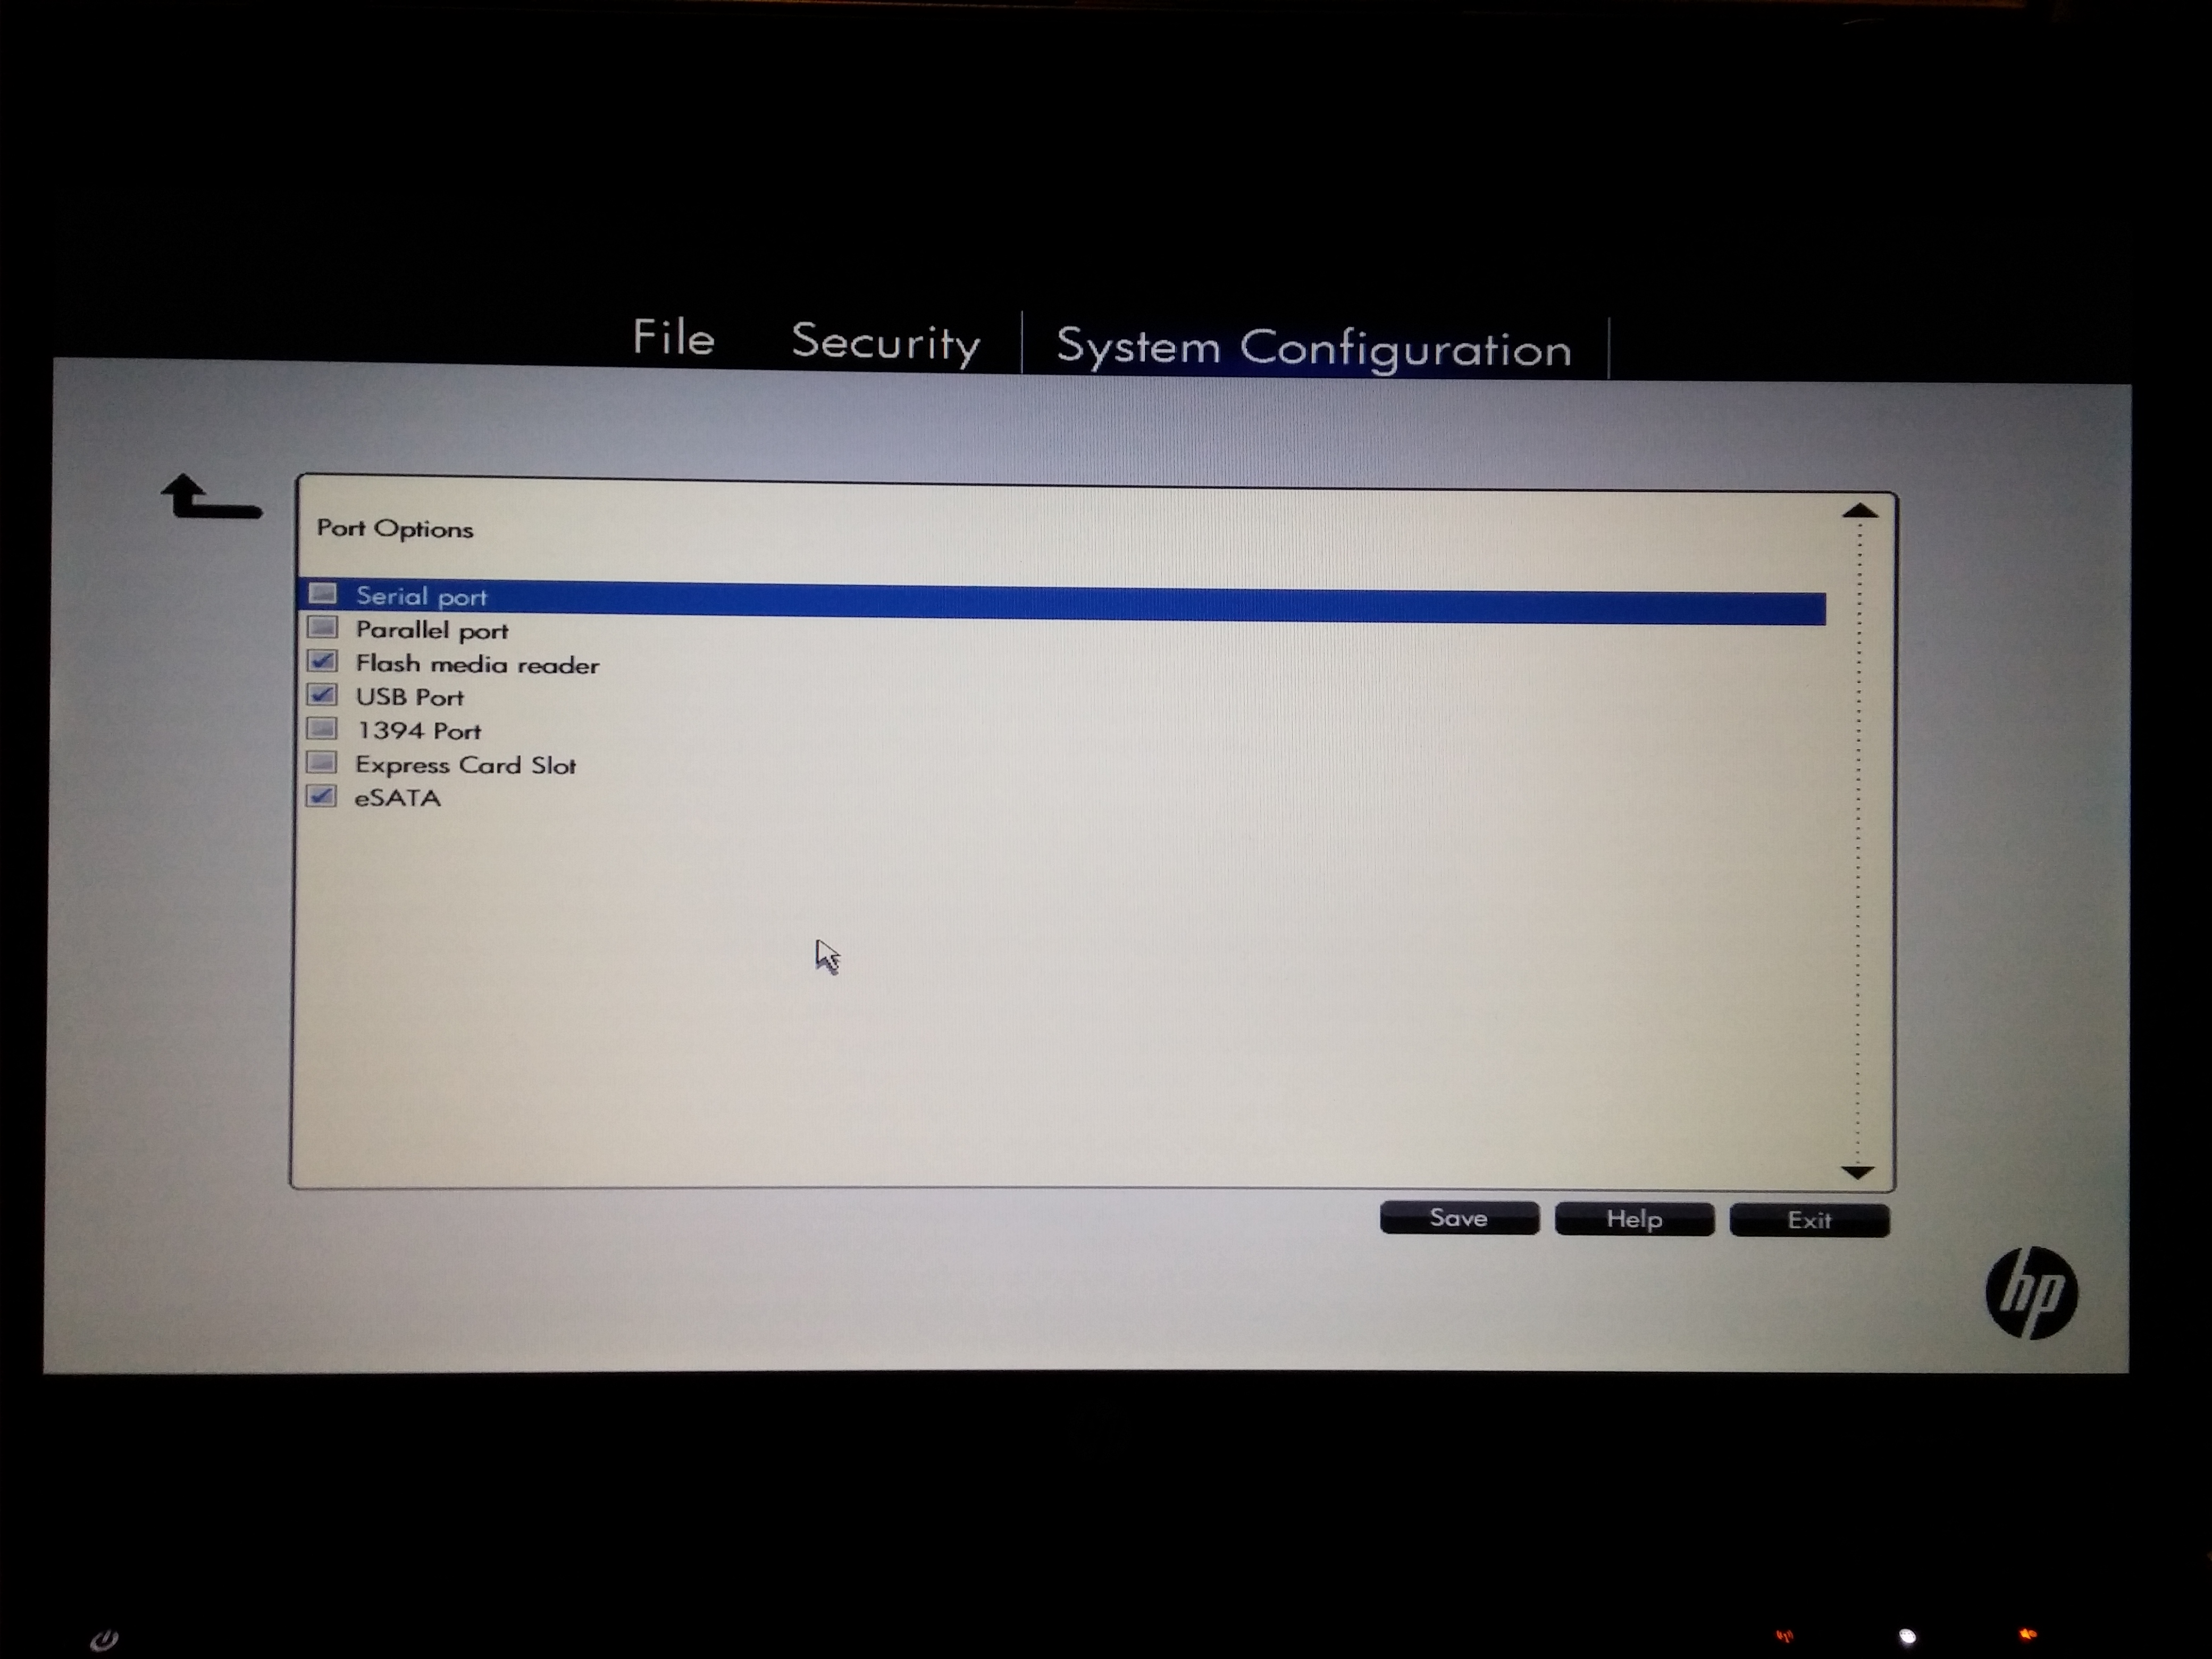 And finally, turn off the crappy old interfaces that nobody uses anymore!
1) They don't work
2) Serial and parallel ports? Really?
Disabling the Express Card Slot was just my personal preference since I'll never use it.
The process
So at that point I had my most of those BIOS flags set correctly (one or two came later after troubleshooting), and I had my OSX installation thumbdrive made with the correct drivers/configuration files. Note that I used option "2b" in the guide, which requires a bit more manual work to set up the installation media, but is potentially more reliable for the installation process.
One more word of caution -- don't be like me and try to install with the thumbdrive in the combination eSATA/USB port. It seems to work fine now that everything is set up, but the BIOS refused to UEFI boot from that port and I spent a couple of very frustrated minutes trying to figure out if I had made my installation media wrong (again). Time to get down to brass tacks! These are the steps I documented for myself, and I ended up doing the process twice (maybe a story for another time) and following them, so I believe they're accurate.
Step by step
- Turn on computer
- First Boot
- Press
F9at HP logo - Choose
EFI - Choose
Clover - Choose
EFI - Choose
boot - Choose
bootx64.efi
- Press
- In Clover (from thumbdrive)
- Choose
Install OS X from OS X Base System
- Choose
- OS X Installation/Setup
- Choose
Utilitiesfrom the menu bar at the top - Choose
Disk Utility- Select the destination drive from the left (warning! drive will be overwritten!)
- Select
Partition Drive - Select
1 Partitionfrom the dropdown box - It should be a
Mac OS X Extended (Journaled)partition - do not choose one of the "case sensitive" formatting options. From what I read some things/applications don't play nice if you do that. - Check under
Optionsto make sure that it's aGUID Partition Table - Click
Apply - Quit Disk Utility
- Now choose
Continueto continue the Yosemite installation - Since I chose the "2b" process while making my installation media, the OS X installation should just happen now, without any further intervention.
- Once it has copied/installed OS X to your internal drive, the computer will reboot (I think, otherwise reboot manually when it's finished)
- Choose
- Second Boot -- same process as first boot though
- Press
F9at HP logo - Choose
EFI - Choose
Clover - Choose
EFI - Choose
boot - Choose
bootx64.efi
- Press
- In Clover -- from thumbdrive again, but choose the other option this time!
- Choose
Boot OS X from *YourPartitionName*
- Choose
- Now OS X should be booting directly from the new installation on the internal drive
And that gets you a "working" OSX installation, but sadly there's more to the process. The computer needs a bootloader installed internally so that I don't need the thumbdrive to boot, and some drivers and configuration files are still missing. There are several tools for this process - Chameleon, Chimera, Unibeast, Multibeast, Clover - but if you have one of a number of models of the HP Probook, there's a tool specifically for us! It's hosted here at bitbucket and not only installs Clover as a bootloader, but handles drivers and various hardware configuration issues as well.
So from there:
- Download/copy -> run HP Probook Installer
- Choose these options (for 6460b)
- Clover UEFI
- Install Clover UEFI bootloader
- OS X support kexts
- option that includes 6460b
- Config and DSDT patcher
- ProBook model
- option that includes 6460b
- Fan behavior
- Readings only
- Display type
- Low resolution :-(
- ProBook model
- SSDT generator/patcher
- Generate SSDT.aml for your CPU Management
- Misc OS X fixes
- Probook logos (optional)
- do not select Fix EDID
- Color Profiles (recommended? not sure there was one for my 6460b though)
- Extra tools
- All optional, but I like the HW Monitor in particular
- Clover UEFI
- Click
Continue - Eject the thumbdrive with OSX installation files (if not already done)
- Reboot
If everything worked, the computer should boot from the shiny new Clover bootloader that was just installed on the internal drive.
Conclusion
Like I mentioned earlier, I struggled through this process a couple times the hard way before I actually followed the directions. Once I followed the directions from the guide to the letter, everything worked as advertised. All my hardware is recognized. Trackpad works well (including basic multitouch, i.e. scrolling). I was lucky enough to get one with a supported Broadcom WiFi card already installed, so that works. I've plugged in external monitors via both VGA and DisplayPort, and both have worked very well -- though sometimes it requires putting the laptop to sleep and then waking it back up for it to recognize a new display (or forget one after it's been disconnected). The Volume/Brightness keys on the keyboard even work.
Now that I've got everything actually working I'm pretty happy with this thing, though it took some frustration to get here. I'm not sure that I would "recommend" the hackintosh concept, but if care is taken to select only a very highly-compatible prebuilt or individual components, then it can work without tearing out hair. I'm enjoying getting to really explore OSX for the first time in depth and seeing what all the fuss is about. For the most part I like what I see, though a few things are lacking.
*cough*windowmanagement*cough*
If you made it this far, thanks for hanging in there with me. I'll save my software environment setup for another post. ;-)